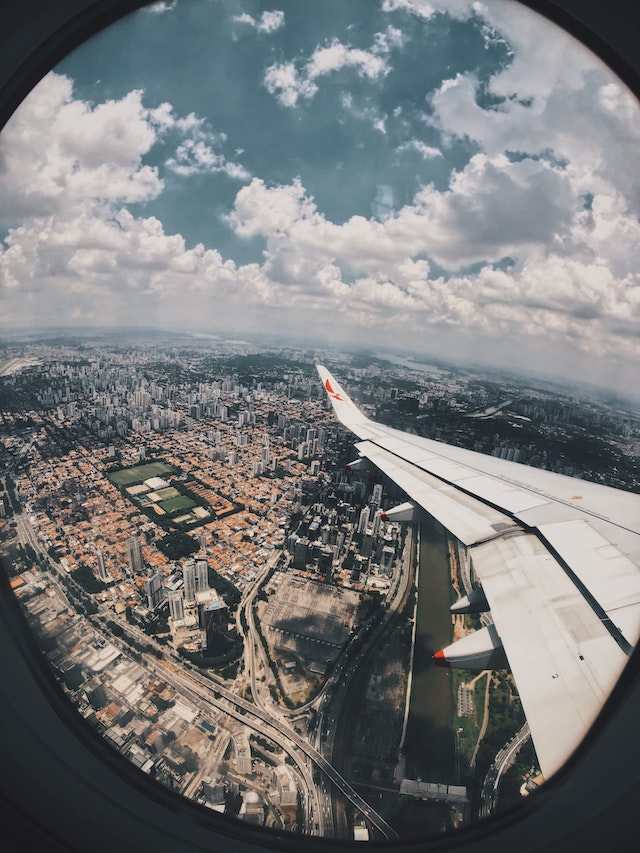
Maak je een back-up van je computer? Met welke software?
Het maken van een back-up op je computer is belangrijk. Zo zorg je ervoor dat als er wat gebeurt met je computer de bestanden op je computer, zoals bijvoorbeeld foto’s en documenten niet verloren gaan. Deze bestanden kun je op verschillende manieren opslaan. We gaan je vertellen met welke software je dit kunt doen.
Het maken van de back-up
Het maken van een back-up kun je op verschillende manieren doen. Als eerste op een externe harde schijf. Hiervoor wordt het meeste voor gekozen. De harde schijf is in verschillende uitvoeringen te verkrijgen. Voor de harde schijf is het aan te raden om een automatisch back-up te maken op een externe harde schijf die je thuis bewaard, maar ook een harde schijf die je buitenshuis bewaard. Dit voor de veiligheid van de bestanden, mocht er thuis ingebroken worden of een brand uitbreken.
Als tweede optie wordt er vaak gekozen voor het maken van een back-up in de Cloud, dit is een programma zoals bijvoorbeeld OneDrive of Dropbox. De Cloud is bereikbaar via het internet vanaf welke computer je ook werkt. Zolang je je inloggegevens hebt kun je altijd bij je bestanden.
Back-up op cd’s of dvd’s goed idee?
Vaak hoor je ook dat je makkelijk een back-up kunt maken door de bestanden op een cd of dvd te branden. Dit klinkt als een goed idee, maar toch raden we het niet aan. Deze cd’s en dvd’s vergaan namelijk binnen 5 tot 10 jaar door de invloed van licht, warmte en tijd.
Ook beschadigen ze een stuk sneller dan bijvoorbeeld een harde schijf. Zodra er een kras op de cd of dvd zit, is het niet meer bruikbaar en kunnen de bestanden die je veilig wilde stellen alsnog vergaan en kwijtraken.
Automatisch back-up instellen
Het maken van een back-up is niet moeilijk. De eerste keer dat je het doet zal het wat meer tijd kosten. Daarna kun je instellen dat de back-up automatisch wordt gemaakt. Dan merk je er zelf nauwelijks meer van. Er worden dan alleen gewijzigde documenten toegevoegd aan de back-up.
Voor elke soort computer kun je dit instellen. Per soort kun je online een stappenplan vinden hoe je dit instelt. Ook kun je een automatisch back-up instellen voor het maken van een back-up naar de Cloud. Als dit automatisch gebeurt heb je er geen omkijken meer naar en ben je ervan verzekert dat je altijd de juiste versie van je bestanden tot je beschikking.
Het terugzetten van een back-up
Je maakt een back-up om te voorkomen dat je je bestanden kwijtraakt. Ook is het handig wanneer je een nieuwe laptop of computer aanschaft, je gewoon al je eigen bestand weer tot je beschikking hebt.
Het terugzetten van een back-up verschilt ook per computer. De verschillende stappenplannen voor Windows en Apple zijn online makkelijk terug te vinden en uit te voeren. Dit scheelt je uiteindelijk heel wat werk met het overzetten van bestanden.
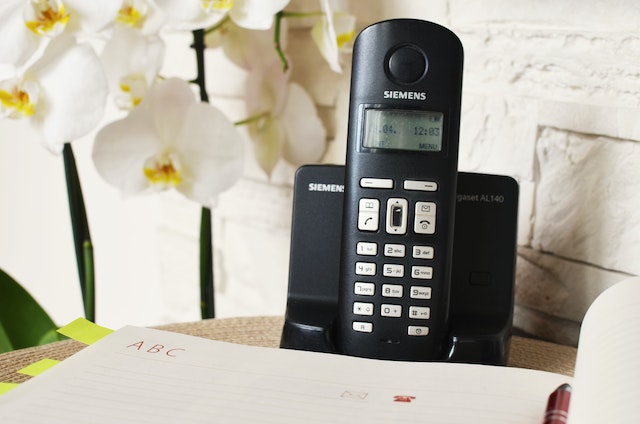
Een telefoonnummer zoeken. Hoe doe je dat op de makkelijke manier?
Een telefoonnummer zoeken deden we vroeger in de grote telefoongidsen die ieder huishouden thuis had liggen. Hierbij kon je met de naam en het adres het bijbehorende telefoonnummer vinden. Dit is tegenwoordig alleen niet meer de meest makkelijke manier om te zoeken, maar hoe dan wel?
Online telefoonnummer zoeken
Als je iemand wilt bellen en je hebt het nummer niet, is het makkelijkste om deze online op te zoeken. Hiervoor zijn verschillende sites te vinden. Ook op deze websites zoek je op naam en adres van de persoon. Daarnaast kun je ook alle telefoonnummers in een bepaald postcodegebied zoeken als je niet precies weet op welk huisnummer ze bijvoorbeeld wonen.
Omgekeerd zoeken
Ook voor omgekeerd zoeken is internet de makkelijkste manier om je antwoord te vinden. Soms word je door een telefoonnummer gebeld dat je niet kent. In dat geval kun je het nummer opzoeken en zal het nummer je kunnen vertellen wie je heeft geprobeerd te bellen.
Op deze manier kom je hier snel en makkelijk achter en weet je of je terug moet bellen of niet. Zo kun je ook meteen zien waaruit het nummer afkomstig is. Dit zie je door het landnummer en het netnummer.
Wat is er zo handig aan Street view?
Veel mensen gebruiken Street view voor verschillende doeleinden. Met Street view is het mogelijk om op veel verschillende plekken rond te kijken waar je nog nooit geweest bent. Wat is er zo handig aan Street view?
De foto’s van Street view
Streetview wordt gemaakt door een auto met een 360 graden camera erop. Deze auto rijdt rond en legt zo de omgeving vast waar hij rijdt. Deze auto heeft een groot Googlelogo aan de zijkant van de wagen, waaraan je hem kunt herkennen.
Waar gebruik je Street view voor?
Streetview is naast heel leuk om onbekende plekken te bekijken, ook nog eens heel handig. Zoals wanneer je bijvoorbeeld naar een nieuwe plek moet voor een afspraak. Je kunt dan voor vertrek op Street view bekijken hoe het pand eruitziet waar je heen moet en waar je voordeur kunt vinden. Ook is het erg handig om te bekijken waar je je auto kunt parkeren in de buurt van je bestemming.
Andere manieren van Street view
Naast de Google Street view auto, zetten ze ook fietsen in om Street view vast te leggen op plekken waar de auto niet kan komen. Ze kunnen zelfs in pretparken Street view maken. Dit doen ze met een Street view trike. Zo kun je zelfs je dagje pretpark ultiem voorbereiden en hoef je nooit meer te verdwalen.
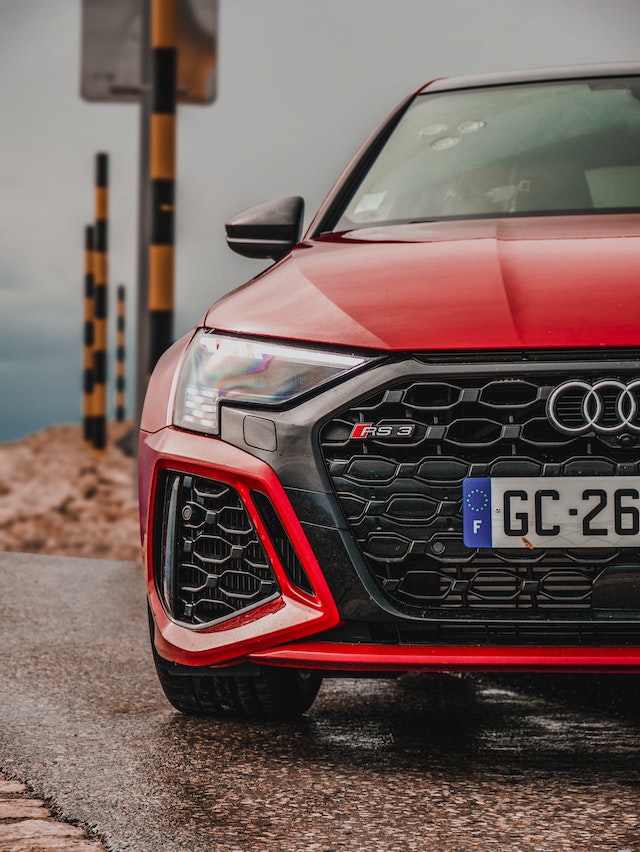
Waarom moet je je auto laten chippen?
Steeds vaker horen je mensen zeggen dat ze hun auto gechipt hebben. Het klinkt interessant, maar de meeste mensen zullen niet weten wat het inhoudt. We gaan je uitleggen wat auto chippen is en waarom je het zou moeten laten doen.
Wat is auto chippen?
Mensen laten hun auto chippen om de auto beter te laten presteren. Vrijwel elke automotor heeft een electronic control unit. Dit is een systeem dat regelt hoeveel benzine of diesel er in de motor gespoten moet worden, de druk van de turbo en het tijdstip van ontsteking.
Door het laten chippen van je auto kunnen deze systemen worden bewerkt en kun je de parameters veranderen. Zo kun je je auto beter laten lopen. Het is niet bij alle auto’s mogelijk. Sommige automerken hebben bij de nieuwere motoren in sommige gevallen een anti chiptuning beveiliging ingebouwd. Dit zorgt ervoor dat het chippen van de auto niet mogelijk is.
Waarvoor wordt het auto chippen gebruikt?
Naast dat het de auto beter kan laten presteren, kan het in sommige gevallen ook zorgen dat de motor minder benzine of diesel gebruikt. Ook is het voor sommige motoren beter om de auto te laten chippen. Zo wordt de motor beter en optimaler gebruikt.
Hoe kun je op de makkelijkste manier een pdf verkleinen?
Soms is een pdf-bestand dat je wilt versturen of uploaden te groot. In dat geval kun je een pdf comprimeren of te wel kleiner maken, zodat je hem wel kunt verzenden. Wat is de makkelijkste manier om een pdf-bestand te verkleinen?
Wanneer verklein je een pdf-bestand?
Pdf is een van de meest gebruikte bestandsformaten om bijvoorbeeld documenten, formulieren of handleidingen te versturen. Pdf is een bestandsformaat om op een betrouwbare en universele manier informatie te weergeven zonder de gemaakt opmaakt te verliezen. Deze pdf-bestanden kunnen in sommige gevallen erg groot zijn als het om veel informatie gaat. In dit geval is het soms te groot om te versturen per mail. In geval kun je beter het pdf verkleinen.
Hoe verklein je een pdf-bestand?
Er is verschillende software die je op je computer kan installeren om voor een pdf verkleinen. Hier doe je simpel het bestand in uploaden en daarna kun je aangeven hoe groot het bestand maximaal mag zijn. De software zal dan je pdf verkleinen.
Dit kun je ook doen door middel van verschillende online tools. Deze werken op dezelfde manier, alleen zijn deze vaak minder gebruiksvriendelijk of kun je maar 1 bestand per keer verkleinen. Dit kost een stuk meer tijd daardoor.
De voordelen van de amfa 4000. Welke zijn dat?
In ons water zitten bepaalde stoffen en mineralen die de hardheid van ons water bepalen. Dit zijn bijvoorbeeld calcium en magnesium. Hoe hoger de concentratie van deze mineralen is, hoe harder ons water. Dit harde water kan kalkaanslag veroorzaken. Maar gelukkig kun je om dit te voorkomen de amfa 4000 gebruiken. Wat zijn de voordelen hiervan?
Zacht water
De amfa 4000 is een waterontharder, die het water zachter maakt. De amfa 4000 zuivert het water, waardoor bijvoorbeeld calcium en magnesium uit het water gefilterd worden. Hierna noemen we het zacht water. Dit zachte water is een stuk beter voor je wasmachine en vaatwasser en zal minder kalkaanslag veroorzaken.
De waterontharder
Er zijn verschillende manieren om je water te ontharden. Dit gebeurt soms met een filter die best prijzig kunnen zijn. De amfa 4000 gebruikt een krachtige magneet om het water te ontharden.
Deze is compact en is snel op de waterleiding gemonteerd. Zo kun je hem al binnen enkele minuten gebruiken. De magneet haalt de deeltjes niet uit het water, maar zorgt ervoor dat het calcium en kalk niet meer kunnen hechten aan de leidingen en apparatuur. Het grootste voordeel, naast dat hij klein en compact is, is dat hij daardoor ook nog eens zeer aantrekkelijk geprijsd is.

Wat moet je doen bij een Enexis storing?
Een stroomstoring is vervelend en komt altijd precies op het verkeerde moment. Als het wel gebeurd is het slim om te weten wat je kunt doen om het zo snel mogelijk te verhelpen. Wat moet je doen bij een Enexis storing?
Netbeheer stroomstoring
Enexis is een bedrijf dat het netbeheer voor stroom regelt. Als er een Enexis storing is, zit niet alleen jij zonder stroom, maar de hele straat of wijk. Als dit het geval is, moet er contact opgenomen geworden met de Enexis, zodat zij de storing kunnen opsporen en verhelpen. Vaak kun je een storing melden via de website.
Enexis storing melden
Bij een stroomstoring kun je ook een landelijk meldnummer bellen. Deze zullen je doorschakelen naar de juiste netbeheerder van de regio waar je woont. Hier wordt snel onderzocht en wordt er gekeken of het probleem door Enexis opgelost dient te worden of dat de oorzaak in je eigen woning is. Op deze manier wordt er gezocht naar een gepaste oplossing om de storing te verhelpen.
Als het om een Enexis storing van de hele wijk gaat, kun je vaak op de website in de gaten houden wat de stand van zaken is. Zo zie je meteen hoe ver ze zijn en wanneer je weer stroom kunt verwachten.

Wanneer kun je een mp3 converter gebruiken?
Gratis muziek downloaden is tegenwoordig niet meer makkelijk te doen. Sinds het in 2014 illegaal is geworden om muziek te downloaden en te verspreiden, is het gratis downloaden van muziek een stuk moeilijker gemaakt. Toch kiezen sommige mensen er nog steeds voor om gratis muziek te downloaden. Op welke manieren kun je dit doen en wanneer kun je een mp3 converter gebruiken?
Mp3 converter via YouTube
Het downloaden van muziek via YouTube met een mp3 converter is officieel vaak niet legaal. De mp3 converter scheidt het geluid van de video en zet daarna het geluidsbestand om naar een mp3 formaat. Op die manier is het makkelijk op te slaan op je telefoon of computer en makkelijk af te luisteren.
In theorie is het downloaden van geconverteerde muziek net zo illegaal als het gratis muziek downloaden. Alleen is de kans dat je een boete ervoor krijgt als je het voor eigen gebruik opslaat, erg klein.
Wanneer gebruik je een mp3 converter?
Een mp3 converter wordt het meeste gebruikt om geluidsbestanden te scheiden van video’s. Zo kun je ze makkelijk luisteren op bijvoorbeeld je telefoon of opslaan voor op je computer. Ook kun je het gebruiken om een ander soort bestand om te zetten naar mp3 zodat het in het juiste formaat te gebruiken is.

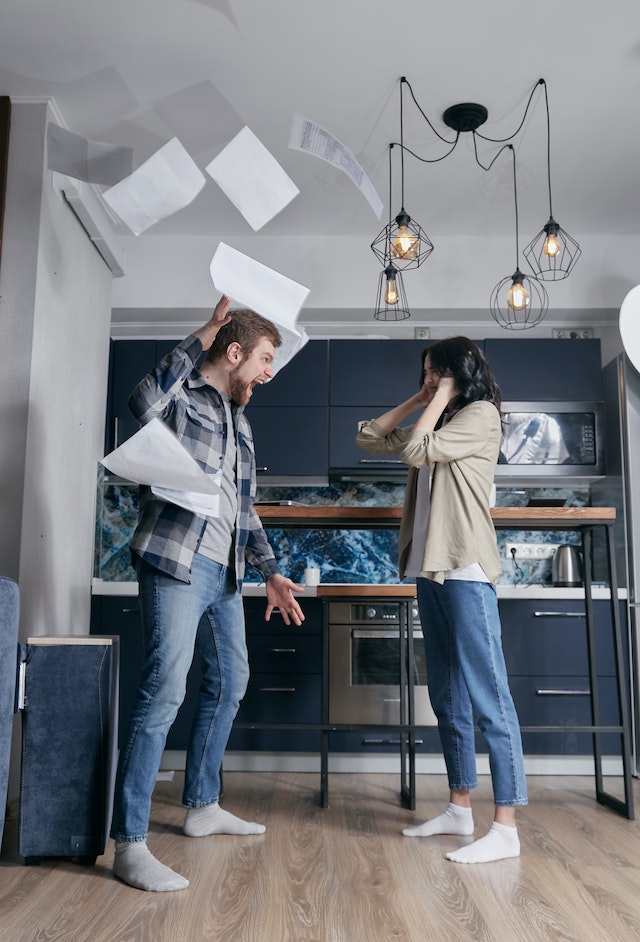
Hoe herken je nepnieuws en wat moet je ermee doen?
Nepnieuws is nieuws wat via verschillende kanalen de wereld in geholpen wordt, maar niet waar is. Dit kan gedaan worden om winst te maken of om mensen te verwarren. Hoe herken je nepnieuws meteen en wat moet je ermee doen?
Verspreiding van nepnieuws
Nepnieuws kom je over het algemeen het makkelijkste, vaakst en snelste tegen op social media. Hier is het snel te verspreiden en is het soms moeilijk te onderscheiden van het echte nieuws. Ze hebben vaak spannende en aantrekkelijke koppen, die de aandacht van de mensen trekt om het te gaan lezen.
Hoe herken je nepnieuws?
Soms is nepnieuws moeilijk te onderscheiden. Wel zijn er een paar punten waar je nepnieuws vaak aan kunt herkennen. Vaak is er een overduidelijke mening in terug te vinden. Deze mening heeft vaak een grappige ondertoon of proberen ze onrust mee te stoken.
Er zijn online een paar specifieke sites en social mediapagina’s die bekend staan om het schrijven van nepnieuws. Van deze pagina’s weet je dus al zeker dat het nepnieuws is. Dit kun je dan al het beste niet aanklikken en ook niet delen op social media. Op deze manier komt het ook bij minder mensen terecht en wordt het nepnieuws minder snel verspreid.

Wanneer heb je een tenaamstellingscode nodig?
Een tenaamstellingscode is een code die hoort bij het kentekenbewijs wanneer je een voertuig aanschaft. Je hebt deze code nodig voor verschillende dingen die je voor je voertuig wilt regelen. Het is dan ook belangrijk dat je deze code goed en veilig bewaard. Wanneer heb je deze tenaamstellingscode allemaal nodig?
Wat is de tenaamstellingscode precies?
De code is gekoppeld aan het kentekenbewijs van je voertuig. De code bestaat uit 2 onderdelen. Het eerste stukje code staat op een soort kassabonnetje die je krijgt wanneer je het voertuig aanschaft. Het tweede deel van de code krijg je per brief. Dit is voor de veiligheid.
Het is zeer belangrijk dat je beide onderdelen van de code goed bewaard. Deze heb je namelijk nodig als je wat wilt regelen voor je voertuig.
Wanneer heb je de tenaamstellingscode nodig?
De code krijg je bij verschillende voertuigen, zoals bij een auto, brommer of motor. Als je het voertuig wilt verkopen moet je deze complete code doorgeven voor de overschrijving. Ook voor het laten schorsen of het exporteren van het voertuig heb je deze tenaamstellingscode in zijn gehele nodig.
Als je de code kwijt bent kun je direct een nieuwe code aanvragen, mits het voertuig op jouw naam staat. Zodra je de nieuwe code hebt, vervalt de oude direct.
Op welke manier gebruik je een elektrische kachel zuinig?
Het gebruik van elektrische kachels wordt steeds populairder sinds de prijzen zo gestegen zijn. Dit maakt het aanzetten van een kachel die verwarmd met gas steeds duurder. Is een elektrische kachel zuinig om als alternatief te gebruiken en op welke manier kun je de kachel het beste gebruiken?
Gebruik van een elektrische kachel
Het gebruik van een elektrische kachel wordt voornamelijk aangeraden als bij verwarming en niet als hoofdverwarming. Toch is er tegenwoordig genoeg keuze voor een elektrische kachel die zuinig in gebruik is. Zo kun je er bijvoorbeeld makkelijk een in de woonkamer neerzetten en aanzetten zodat de woonkamer fijn opwarmt. Zo wordt het sneller opgewarmd en hoef je niet de hele tijd en kachel aan te laten staan.
Is een elektrische kachel zuinig?
De elektrische kachels van tegenwoordig zijn een stuk veiliger en zuiniger dan vroeger. Ze hebben tegenwoordig vaak een ingebouwde timer en thermostaat. Dit zorgt er ook voor dat de kachel niet onnodig lang aan blijft staan. De timer zal ervoor zorgen dat hij op een bepaalde tijd aan springt en op een bepaalde uitspringt. Ook kun je de thermostaat instellen dat hij bij een bepaalde temperatuur uit gaat. Zo verwarmt hij de ruimte tot bijvoorbeeld 21 graden en gaat dan vanzelf uit.
Het apenstaartje waar staat het voor en wanneer gebruik je het?
De geschiedenis van het apenstaartje gaat al eeuwen terug. Hieruit kunnen we de conclusie trekken dat de oorsprong ervan niets met e-mails te maken heeft. Maar waar staat het apenstaartje dan wel voor en wanneer wordt het gebruikt?
Oorsprong van het apenstaartje
Volgens velen werd het apenstaartje al in de 15e eeuw door Spaanse kooplieden gebruikt. Ze gebruikte het om een kwart van iets mee aan te duiden. Ook is het mogelijk dat de oorsprong ligt in Toscane in Italië. Hier zouden het een samenvoeging zijn van de a en de c en de betekenis ‘al cambio’ hebben, wat de wisselkoers van een andere valuta aangaf.
Het apenstaartje in e-mailadressen
Het apenstaartje had door de jaren heen dus een economische invulling. Daarom werd het symbool behouden op toetsenborden van de typemachines en later dus ook op en toetsenborden van computers.
Het teken werd steeds minder gebruikt, dus werd er in de 20e eeuw een nieuwe betekenis aan gegeven. Ray Tomlinson, de persoon die de eerste e-mail verstuurde, had om technische reden een teken nodig dat niet in namen voorkwam en koos daar willekeurig de apenstaart voor. Tot op de dag van vandaag wordt het apenstaartje nog steeds overal ter wereld voor elke e-mailadres gebruikt.
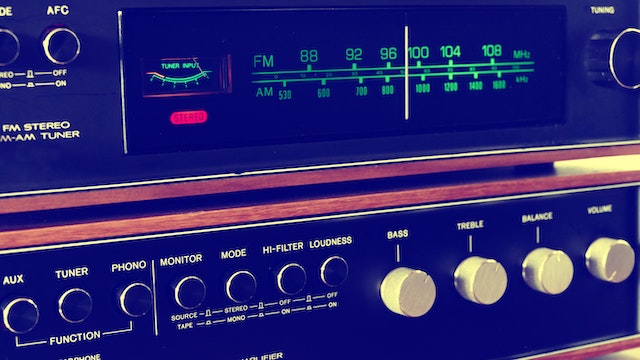
Hoe werd radio Veronica zo groot?
Radio Veronica is een radiozender die niet meer weg te denken is van de radio. Het is ooit begonnen als zee zender en is tegenwoordig een van de grotere commerciële radiozenders. Hoe is radio Veronica zo groot gegroeid?
Het begin van radio Veronica
Radio Veronica werd als zee zender opgericht in 1960. In het begin waren ze vooral erg populair bij de jeugd en werd vooral de nieuwste popmuziek uitgezonden. Ook ontstond er een wekelijkse hitparade, wat later omgedoopt is tot de Veronica Top 40.
In 1974 moest de radiozender stoppen met uitzenden door de anti-piratenwet. Het duurde tot 2003 dat ze weer radio gingen maken in de vorm zoals we ze nu kennen.
Hoe zijn ze zo groot geworden?
Radio Veronica waren voorlopers en trendsetters op het gebied van radio. Naast dat ze dus de Top 40 zijn begonnen, waren ze ook de eerste die begonnen met het gebruiken van radio jingles en het geven van drive-in shows. Dit betekende dat de luisteraars hun favoriete radio dj’s live konden bezoeken in de discotheek.
Dit zijn dingen die we tegenwoordig niet meer weg kunnen denken uit radioland. Elke radiozender maakt gebruik van jingles en veel zenders doen ook drive-in shows. Ook hebben ze een groot deel van het succes te danken aan de radio dj’s.
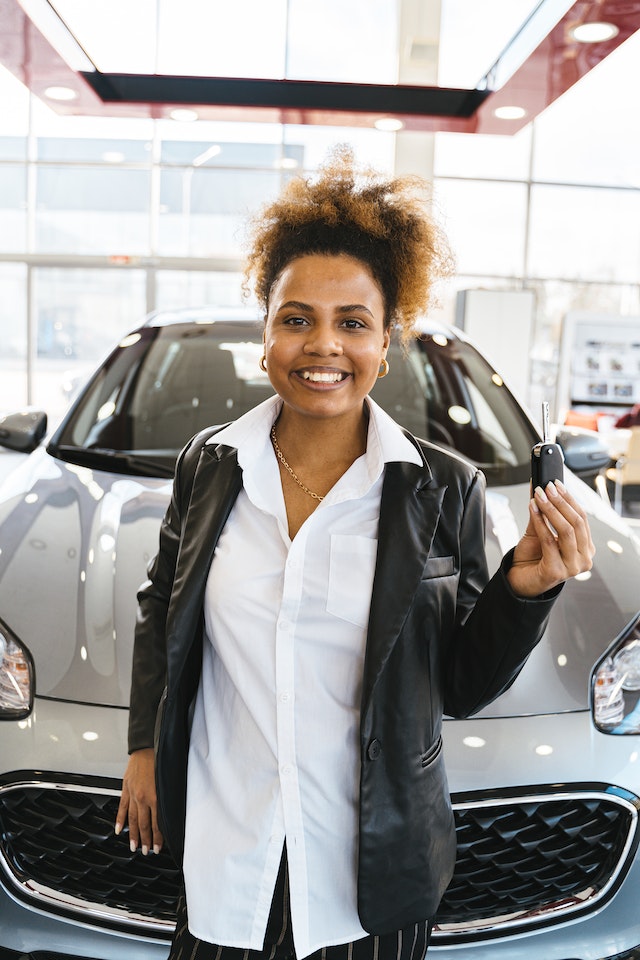
Wanneer maak je gebruik van een mortgage calculator?
Als je een huis wilt gaan kopen zul je al snel op zoek gaan naar alle informatie over een hypotheek. Je zult je hier dan ook zeker in moeten verdiepen. Een hypotheek is namelijk een breed begrip. Je kunt gemakkelijk berekenen hoeveel hypotheek je kunt krijgen met een mortgage calculator. Wanneer maak je gebruik van een mortgage calculator?
Wat is een hypotheek?
Voordat je je mogelijke hypotheek gaat berekenen met een mortgage calculator, is het slim om uit te zoeken wat een hypotheek nu precies is. Een hypotheek is een lening die je bij de bank afsluit voor het kopen van een huis. Je moet dan ook bij het afsluiten van deze lening je huis als onderpand aanbieden. Als je de hypotheek niet terug kan betalen, mag de bank beslag leggen op je huis.
Hoe bereken je een hypotheek?
Een mortgage calculator kun je helpen met het berekenen van je hypotheek. Elke bank heeft zijn eigen calculator voor het berekenen van de hypotheek. Zo kun je zelf een inschatting maken hoeveel je maandlasten zullen gaan zijn en of je deze kosten kunt dragen. De mortgage calculator houdt daarom ook bij het berekenen rekening met je inkomsten.